

 Introduced in the 2007 model year, the 6L80E (code JMBX) created challenges for rebuilders’ right out of the gate. Such as friction failures, cracked dampers, and covers that were on the edge of being too thin right from the factory. No problem; we’re used to being challenged right? Bring it on; we’ll figure it out.
Then, as soon as you start to get comfortable, somebody throws a 2426 8442 code converter on the counter. What does this fit? You ask. Nothing special: just a 2014-up Chevrolet Pickup with a 4.3L. What do you suppose the chances are you’ll see one of those? Pretty good, I’m guessing.
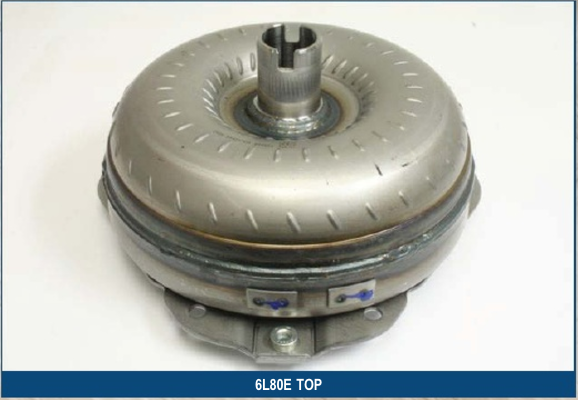
As you can see, this 6L80E is nothing like the JMBX code… good, right? 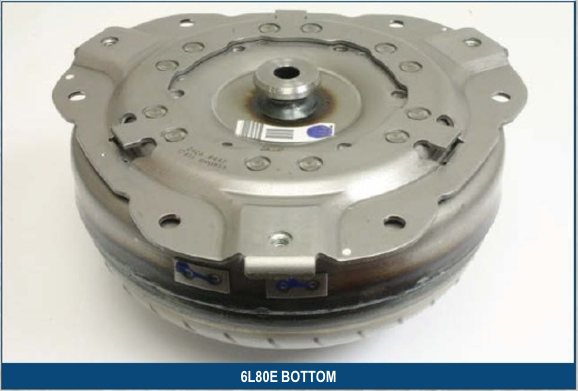 Well, it is if you have your captive clutch process in place. Yep; this one has a captive clutch with a design that’s a little different than some of the captive-clutch GM products you may have worked on.
Once you cut this converter open, you’ll find a typical cover assembly that contains a dual-faced friction plate and a piston held in place by six rivets (figures 1-4). The rivets holding the piston in place are attached to six return springs.
This is where things get a little different: Unlike many of the GM products that have the springs on the outside of the piston, these return springs are hidden under the piston. These springs are also much more robust, which you’ll notice once you’ve removed the piston.
 TO REMOVE THE PISTON:

- Clamp the cover in your drill press or mill and drill out the six rivets, taking care not to oversize the holes in the piston.
- Once you’ve removed the piston and friction, completely remove the remaining rivet. It may put up a bit of a fight, so take care not to damage the spring or oversize the rivet hole.
At this point you can complete any needed repairs to the cover, piston, or friction plate.
To reassemble the cover you’ll need a couple things: a fixture to hold the cover in your riveter and tool to support the rivet head when riveting. Because the rivet head is hidden, this will be a bit of challenge.
With a little converter builder ingenuity and a piece of flat strap, you can make a tool to insert through the center hole of the piston to support the rivet (figures 5-7). This will suffice for “one off” or short run work. When your production increases, you may want to invest in developing higher quality support tool, as repeated use will stress the soft flat strap steel.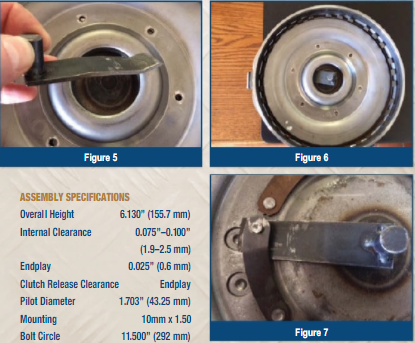
- Install all six rivets into the return springs.
- Add the friction plate and piston.
- With the rivet head supported, complete the rivet process on each rivet. Because of the stiffness of these springs, each rivet becomes more of a challenge to position the support tool in place.
- Once you have the six rivets attached, test the piston travel to make sure the piston clamps onto the friction plate when needed.
Your converter is now ready for final assembly. Your clutch clearance on this converter is the endplay. Make sure you take the time to set your pre-weld clearance to a setting that’ll allow you the correct post-weld clearance.
Different welding systems will provide a different end result, so you’ll have to develop a model that works for you. We’ve included the common specs for this converter. The full spec sheet can be found online at www.tcraonline.com.


