
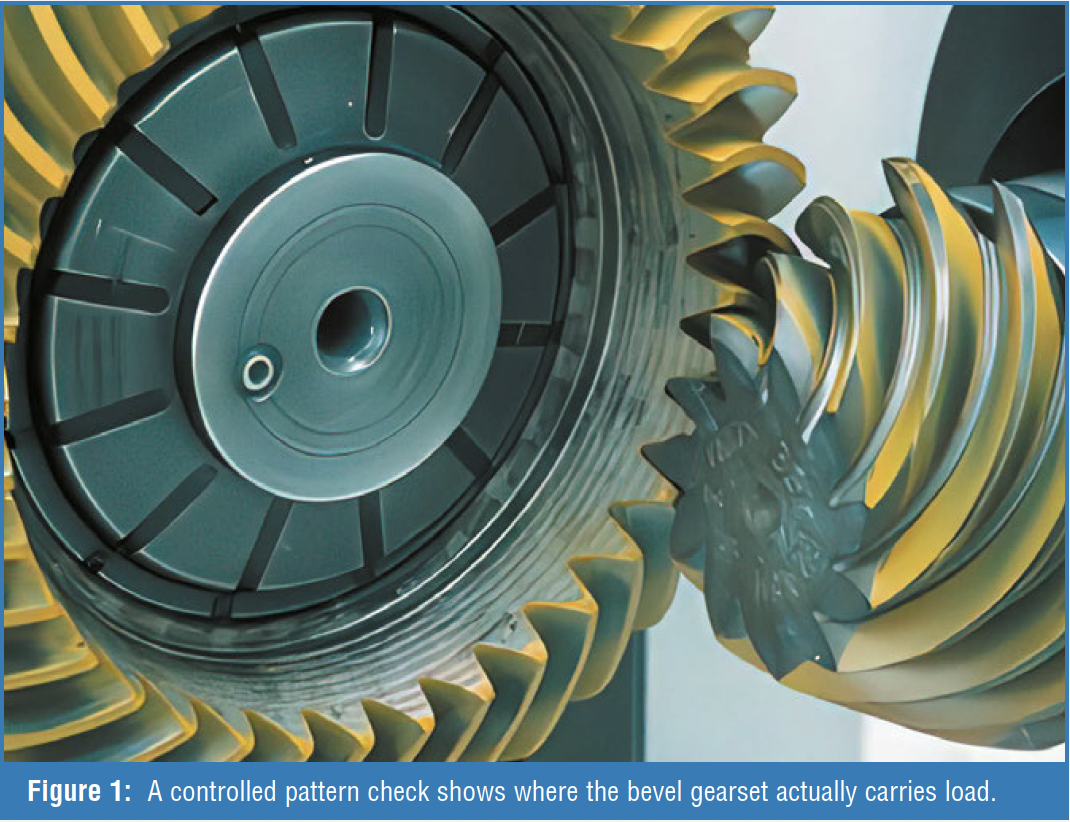
A bevel gear contact pattern is one of the quickest ways to see how a gearset is actually carrying load. It shows where the tooth flanks meet under a defined setup condition and often reveals problems that a backlash reading alone cannot. For bevel gears, mounting distance, backlash, bearing setting, housing stiffness, lubrication, and load direction all influence the final pattern. In other words, the pattern is not just a mark on the tooth; it is a visible result of the whole assembly condition (Figure 1).
 This matters because bevel gears are often built into larger transmission or drivetrain assemblies, including differentials, right-angle drives, transaxles, final drives, and compact gear units. When a bevel gear mesh is misaligned, the symptoms may appear to be a much larger transmission problem: noise, heat, vibration, debris, or premature wear. Replacing the entire assembly too early can mask the true cause and lead to the same failure after new parts are installed.
The reverse can also happen. A bearing issue, housing distortion, shaft misalignment, lubrication problem, or another gear stage can change how the bevel gearset carries load. That can make the bevel gears look guilty even when the root cause is outside the gear pair. The goal is not to blame the bevel gears first. The goal is to use the contact pattern as an early diagnostic clue, then confirm it with backlash, mounting records, support checks, and operating evidence.

How Bevel Gear Issues Can Be Mistaken for Transmission Problems
A bevel gear problem rarely announces itself as “only a bevel gear problem.” It usually appears as a system symptom. A poor contact pattern may create noise, heat, vibration, debris, or uneven tooth wear. In a complete transmission or drivetrain assembly, those same symptoms may also be caused by bearings, shafts, housing distortion, lubrication, or another gear mesh.
 That is why replacing the whole transmission assembly too early can be misleading. If the root cause is incorrect mounting distance, insufficient support stiffness, or backlash that changes under load, the same condition may return after replacement. A contact pattern check helps the team ask a better first question: is the bevel gearset carrying load correctly, or is the surrounding transmission structure forcing it into a bad condition?
This also works in the opposite direction. A bevel gearset may exhibit an abnormal pattern due to a loose bearing, a misaligned housing bore, or a unit being checked under an unrealistic load condition. The pattern is not the final verdict. It is a diagnostic starting point that must be confirmed with measurements and assembly evidence.
 What a Good Pattern Should Show
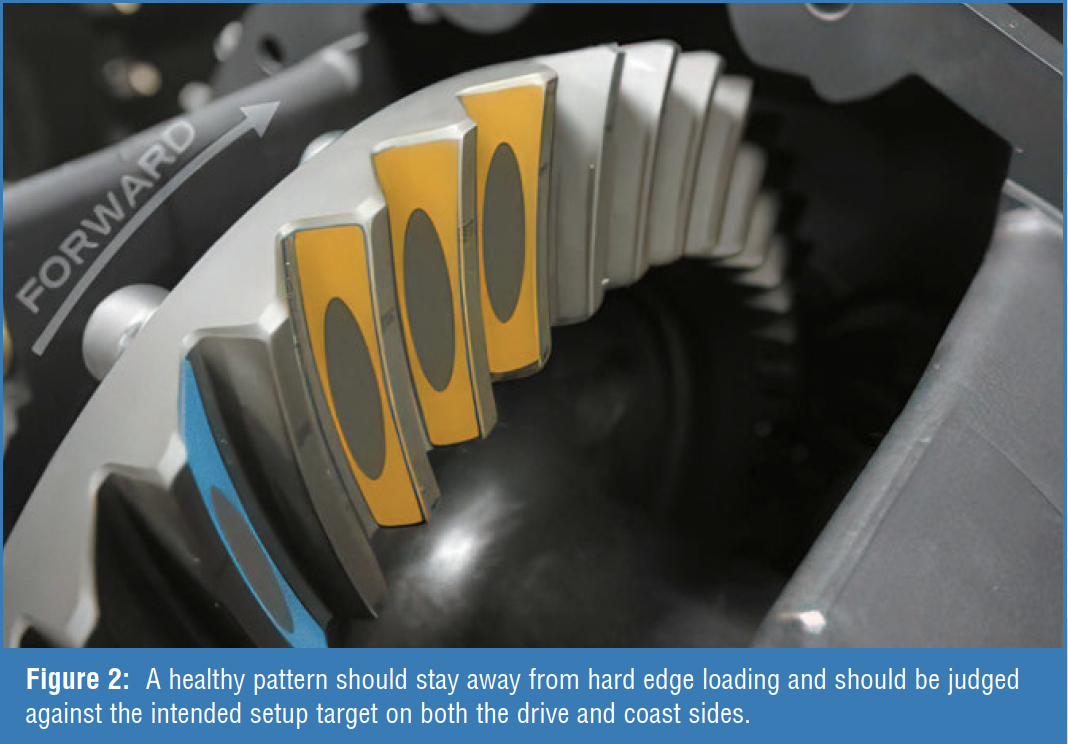
A good bevel gear contact pattern is not simply the largest mark on the tooth. The preferred pattern depends on the gear design, the checking method, the load condition, and whether the checked side is the drive or coast flank. Still, a useful field rule is that the contact should avoid hard-edge loading and should remain consistent enough to match the intended setup (Figure 2).

If the pattern is close to the design target, the next step is not to keep adjusting until it “looks prettier.” The next step is to confirm that backlash is within range, record the mounting condition, and verify that the pattern can be reproduced after the next assembly or load check. 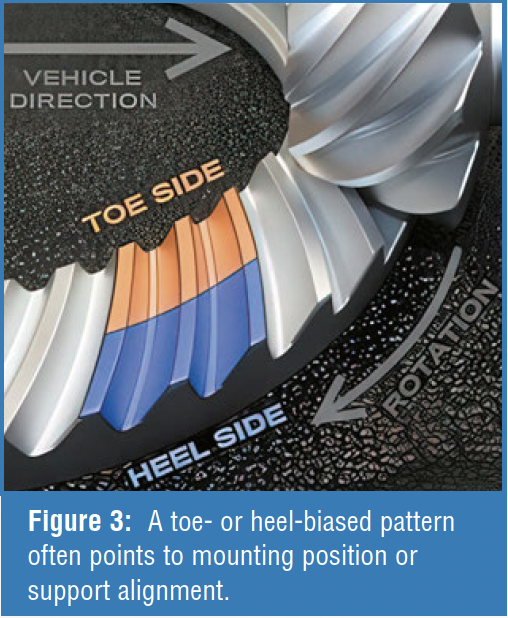 This is also why pattern reading and backlash measurement belong together; either one by itself can send the repair team in the wrong direction.
Common Bad Patterns and What They May Indicate
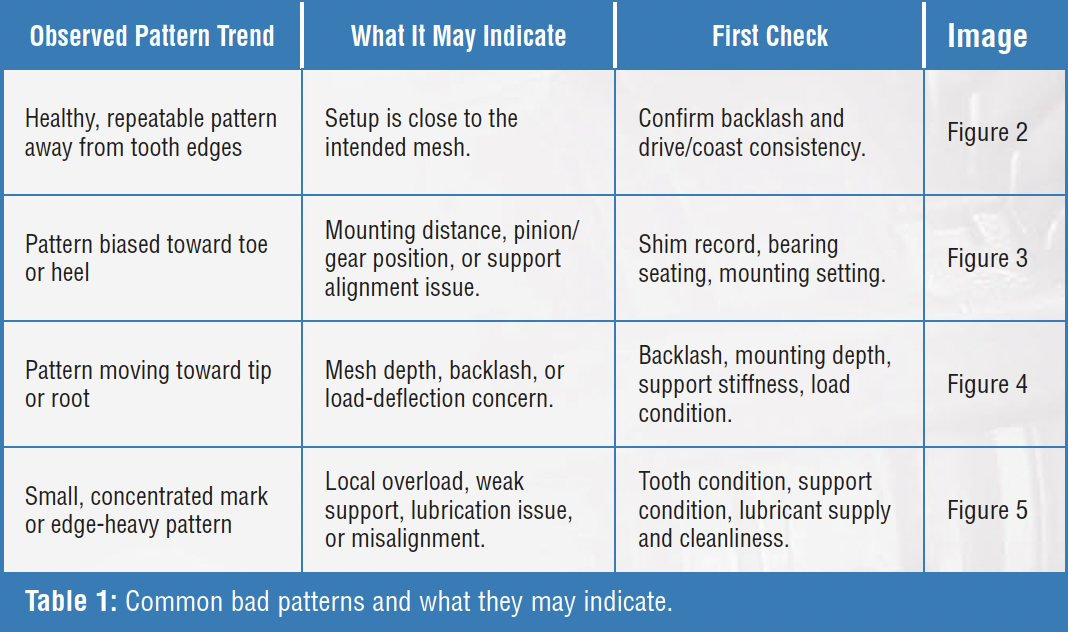
The chart in Table 1 should be treated as a troubleshooting guide, not a universal correction rule. Different bevel gear systems, tooth forms, manufacturing methods, and checking loads may have different target patterns. The value of the chart is that it gives the team a sequence: read the pattern, identify the most likely direction of error, and verify the adjustable items before moving to a high-cost repair.
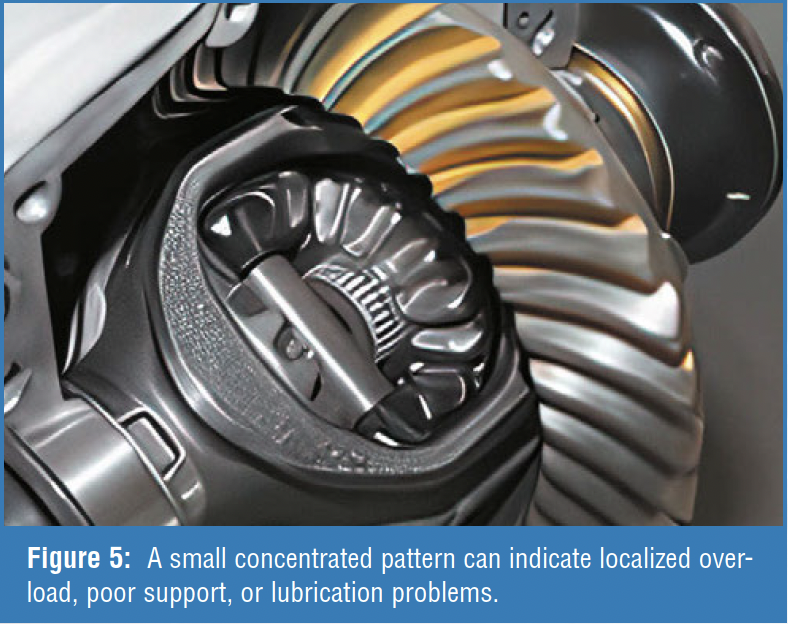
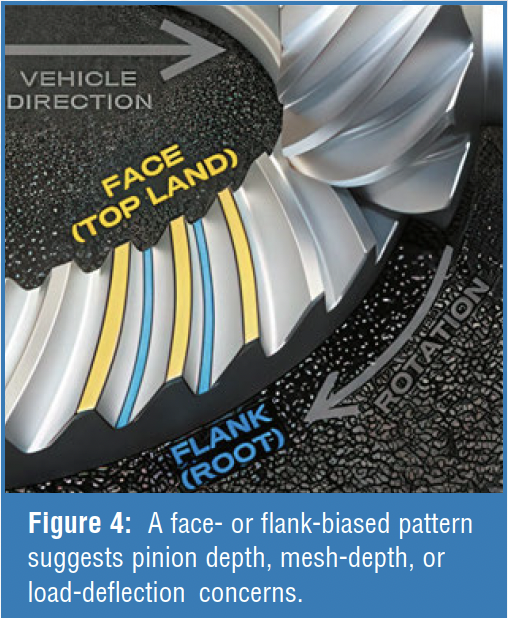 If the contact pattern looks acceptable but noise, heat, debris, or vibration continues, the bevel gearset should not be treated as the only suspect. In that case, move the investigation outward and check bearings, shafts, housing alignment, other gear stages, lubrication, and operating load before making a replacement decision (Figure 3, 4 and 5).
How to Check Patterns Without Creating a False Clue
Many misleading pattern readings come from the checking method itself, not from the gearset alone. Before applying the compound, the assembly condition should be stable: bearings seated, fasteners tightened, support parts installed, and the same test method used each time. If the support condition changes between checks, the pattern comparison becomes unreliable.
Apply the marking compound evenly, avoiding a thick layer that can blur the result. Roll the gearset under controlled resistance so the tooth flanks mark clearly. Record whether the pattern is on the drive or coast side, because each side tells a different part of the story. A useful pattern photo should also include the backlash value, rolling direction, load method, and any shim or mounting change made before that check.
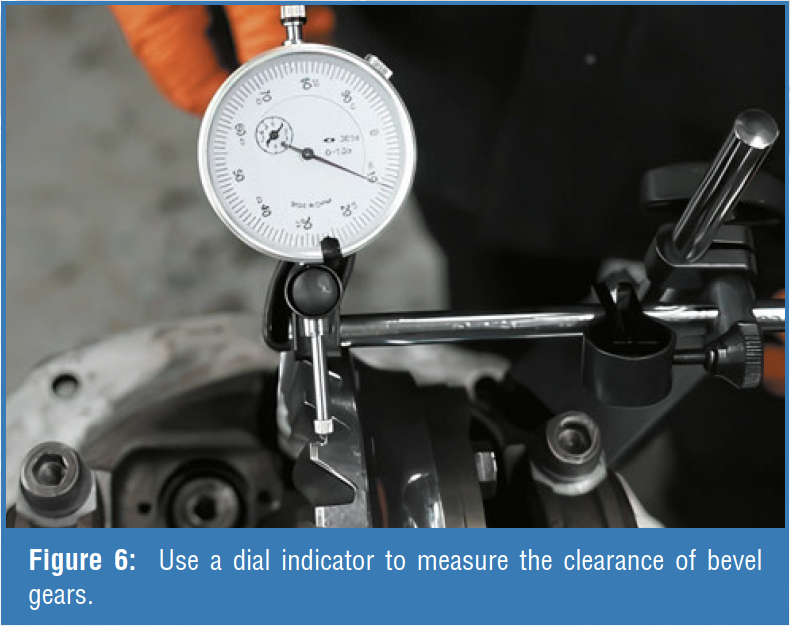
 Backlash should still be measured, but it should not be allowed to overrule the pattern (Figure 6). A bevel gearset may show an acceptable backlash reading in more than one assembly position, while the contact pattern still shows that the mesh is not in the intended location. This is why mounting distance, backlash, and contact pattern belong together in the same inspection record.
Before Replacing the Gearset or Transmission
Before replacing the gearset or the entire transmission, ensure the decision is supported by repeatable evidence. The minimum evidence should include pattern photos from the checked flanks, backlash readings from multiple positions, the current shim or mounting record, and a note on the load method used during the pattern check.
 If the pattern moves after a small adjustment, do not jump directly to replacement. Confirm whether the movement follows a predictable pattern of mounting or backlash. If the pattern remains unstable even after controlled setup checks, then the investigation should move outward to the supporting structure: bearings, housings, shafts, alignment, lubrication, and other gear stages.
The key is to avoid replacing parts based only on symptoms. Noise, heat, and debris are important warning signs, but they do not automatically identify the failed component. The contact pattern helps narrow the question from “Is the whole transmission bad?” to “Is this bevel gearset carrying load correctly, and if not, what is forcing it out of position?”
Conclusion
A bevel gear contact pattern should be examined before the entire transmission is blamed, but it should not be examined in isolation. A pattern tells you where the gearset is carrying load; backlash, mounting records, bearing condition, and operating evidence tell you why that pattern looks the way it does.
The strongest repair decisions come from connecting these clues. If the pattern is biased, concentrated, or unstable, the next step is not automatic replacement. The next step is to verify mounting position, backlash, support stiffness, lubrication, and load condition. If the pattern looks acceptable but the transmission still shows noise, heat, or debris, the investigation should move outward to bearings, shafts, housing, and other gear stages.
In other words, the contact pattern is the first visible link between the bevel gearset and the larger transmission system. Reading it correctly helps teams avoid unnecessary replacements, reduce repeat failures, and make repair decisions based on evidence rather than symptoms.
About the Author
Feng Liu is the CEO of Wenlio Gear, focusing on bevel gear manufacturability, quality control, and delivery alignment in custom gear programs.