
Circle track racing is a very competitive sport, with races often won or lost by less than a tenth of a second. With this in mind, even the smallest improvements to the racecar can take you to the winner circle.
Because many classes have strict rules about engine modifications, we sometimes need to look elsewhere to find these small performance gains. In this edition of Transmission Therapy, weʼll discuss modifications to the TH350 that can shave a few hundredths or even tenths of a second from your lap times.
 Taking load off the engine is like adding horsepower. Building a transmission with lower drag, less static weight and less rotating weight can do just that. However, with weight reduction comes possible durability problems. The key is to find a happy medium. This depends on the engine horsepower, vehicle weight, and type of track (pavement or dirt).
In circle track racing, there are two ways the TH350 is used. For short tracks, only first gear is used; for longer tracks, only second gear is used. In this article, weʼll cover both. If youʼre building a second-gear transmission, all of the modifications in this article will allow a manual low, first gear start. This function is something you may need, to get up to speed quickly during the first lap or after an accidental spinout.
 Static Weight
Transmission static weight is the weight of all non-rotating parts of the transmission. Static weight reduction is often not practical. One reason is that all classes have minimum weight rules. Another reason is that static weight reduction doesnʼt affect the performance nearly as much as rotating weight reduction.
Not to mention, if you need to lose a static weight of 5 to 10 lbs, it might be easier just to ask the driver to go on a diet!
Rotating Weight
 Rotating weight is all transmission parts that rotate. Unlike static weight, reducing rotating weight can greatly improve performance by reducing the load on the engine. Depending on whether the racecar runs in second gear only or first gear only, there are areas where you can lower the rotating weight easily, using parts that were produced by GM when gas mileage first became an issue.
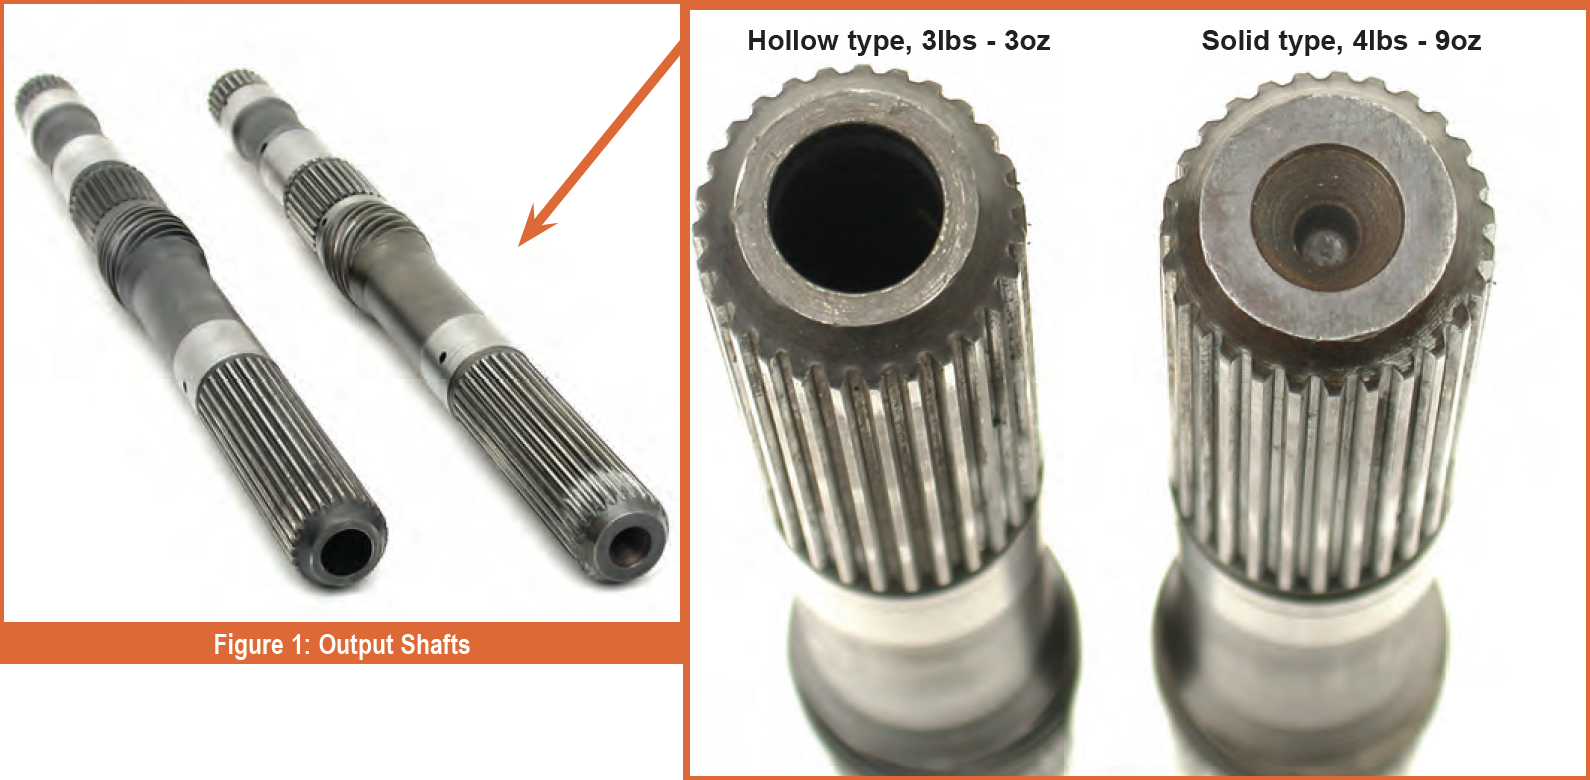
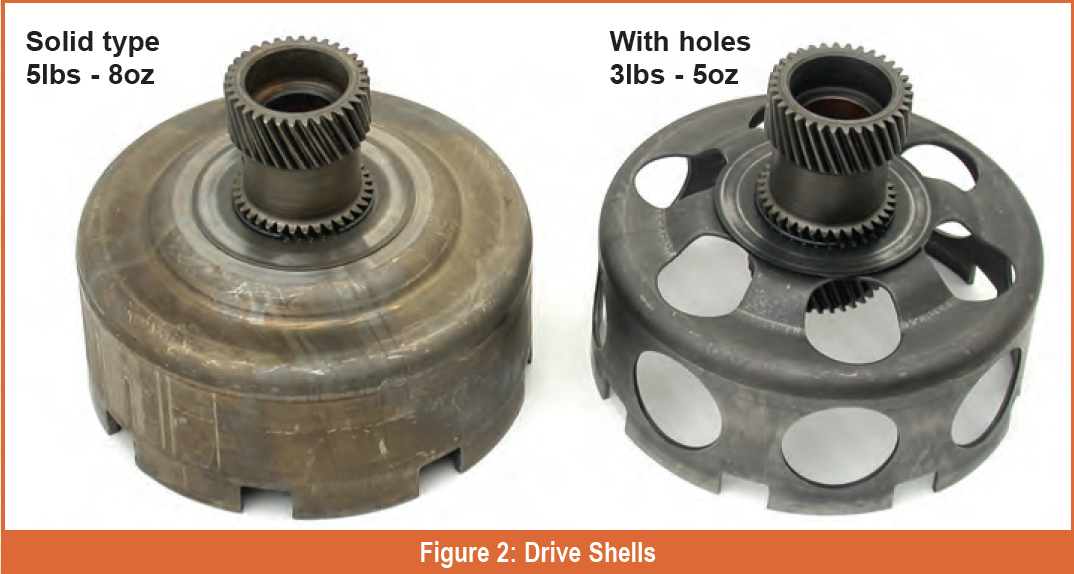
The solid output shaft for the six-inch tail housing weighs 4 lbs., 9 oz., while the hollow output shaft weighs only 3 lbs., 3 oz. (figure 1). Although the hollow shaft isnʼt common, you can still find one if you search. The solid drive shell weighs in at 5 lbs., 8 oz., while the drive shell with holes in it weighs a mere 3 lbs., 5 oz. (figure 2). Keep in mind that in a second-gear transmission, the drive shell doesnʼt rotate, so replacing the drive shell would only reduce static weight. In a first-gear transmission, the lighter drive shell would reduce rotating weight, and offer greater performance gains.
 Rotating weight can be reduced further by drilling holes and machining excess metal from rotating parts, such as grinding the park lugs off the rear ring gear (if park isnʼt necessary).
Washer Drag
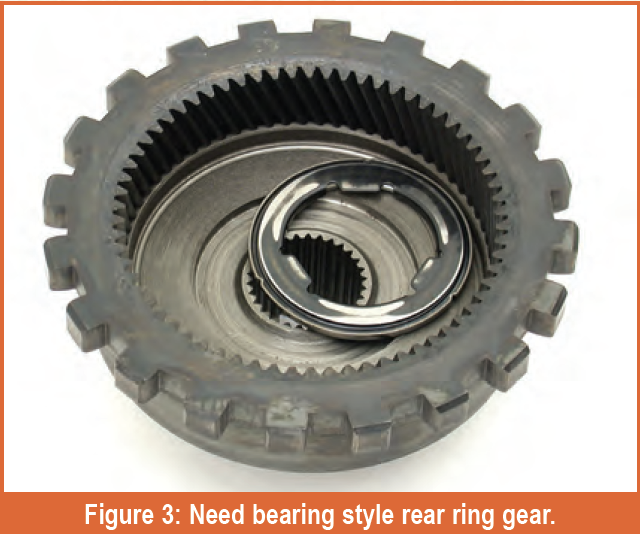
Drag is unnecessary friction that creates heat and robs horsepower from the engine. One way to reduce drag is to replace thrust washers with needle bearings. Always use the needle bearing-style rear ring gear (figure 3) and front planet (figure 4). These two areas will reduce drag in both firstgear and second-gear Throwback GEARS May-June 2003 Figure 5: Bearing style pump Figure 6: Rear planetary with two pinion gears removed. For second gear transmissions only. transmissions.
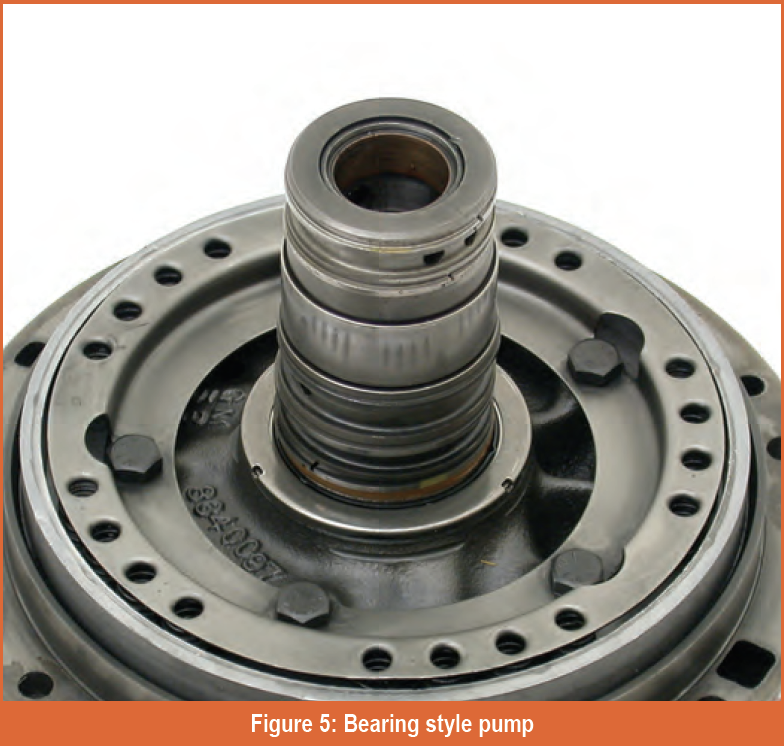 Using a needle bearing-type of pump (figure 5) will reduce drag on a first-gear transmission, but isnʼt as important on a second-gear transmission, because the direct drum doesnʼt rotate.
Gear Drag
The rear planetary transmits power in first gear and reverse, and freewheels in second gear. So in a second-gear transmission, you can completely remove two of the pinion gears (figure 6).
Clutch Drag
Clutch drag can rob you blind. One way to reduce clutch drag is to remove as many clutches as possible.
 Whether you have a first-gear or a second-gear transmission, the direct clutch is only used for reverse. Use a three-clutch direct piston from a 6 cylinder, and only install two frictions. To take up the clearance, install an extra steel plate just below the backing plate. Warn the driver not to abuse reverse: Itʼs not as strong with only two clutches.
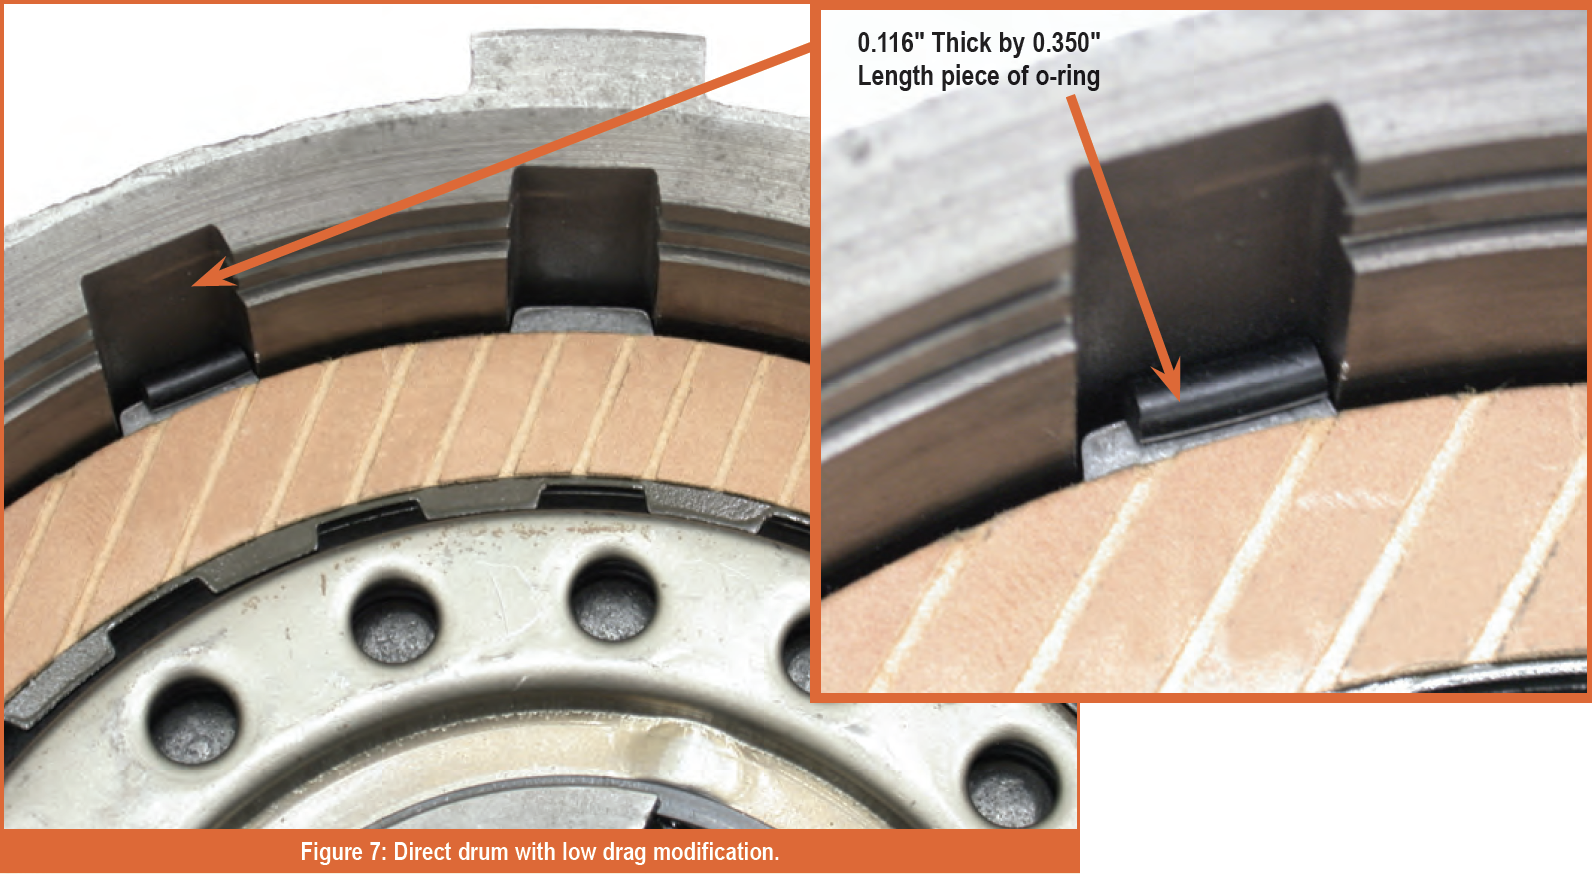
To reduce the direct clutch friction even more, install pieces of O-rings between the steel plates that are 0.010″ to 0.018″ thicker than the frictions. In our transmission, we used 0.100″ frictions with 0.116″ thick strips from a KM175 pump O-ring, cut into 0.350″ lengths. We placed them on every other tab of the steel plates, on the outside of both frictions (figure 7). As the vehicle accelerates and decelerates, the steel plates no longer drag against the frictions. But when you select reverse, the direct piston supplies enough pressure to compress the rubber spacers and fully apply the clutch.
In a first-gear transmission, the low-reverse clutch has to hold for reverse and engine braking in first gear. Use an 8-cylinder piston and install all five frictions.
 A second-gear transmission, however, only uses the low-reverse clutch for reverse. In this case, use a 6-cylinder piston and only install two frictions. To make up the clearance, add as many steel plates as necessary. Always add the extra steel plates to the piston side of the low-reverse clutch pack. Under hard acceleration, the extra steels will press against the piston and not against the frictions.
In first-gear applications, remove the second-gear piston, clutches and steels. You can also remove the band and the intermediate sprag assembly. This will reduce static weight, rotating weight, and drag.
Burnt Intermediate Bands
On second-gear transmissions, the band is used for engine braking. In most applications, this function isnʼt critical. But in circle track racing, engine braking is very important.

Some racers lower mainline pressure to reduce the horsepower necessary to turn the pump. Itʼs not a bad idea as long as the clutches can survive the lower pressure.
If the forward and intermediate clutches last but the band burns, thereʼs an extreme measure you can take:
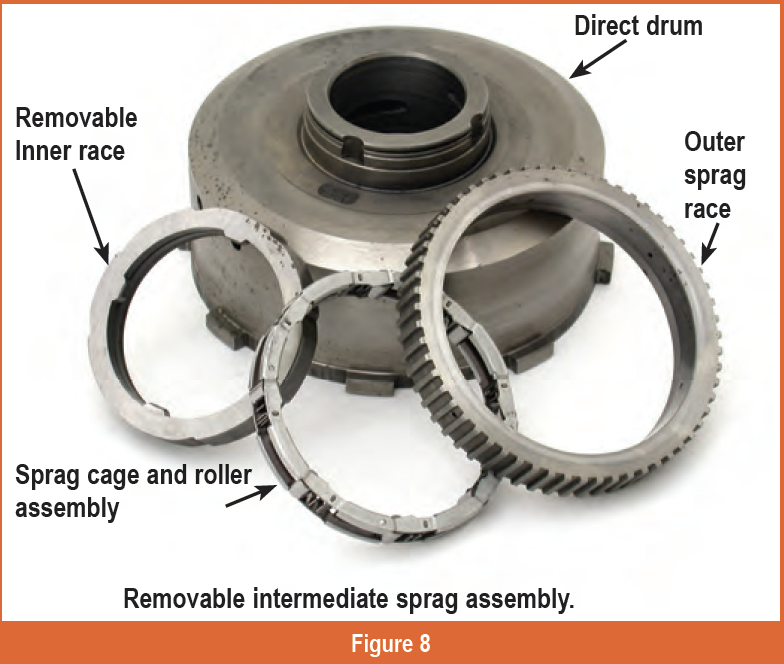
- Find a direct drum with a removable inner race (figure 8).
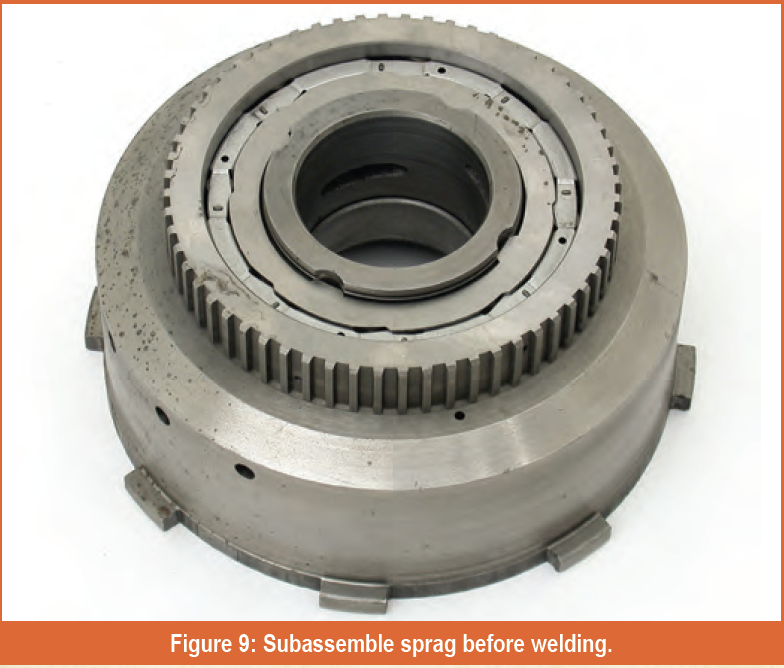
- Use the sprag cage and rollers to center the outer race (figure 9).
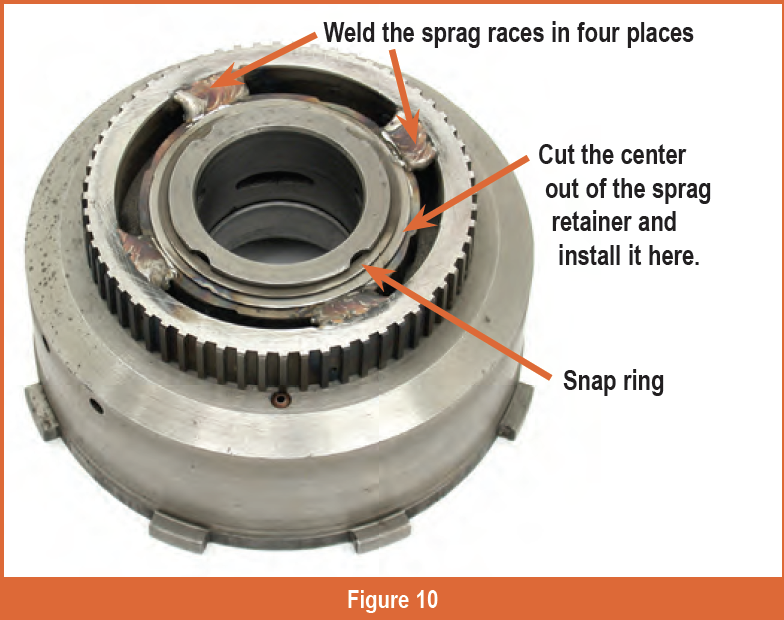
- Weld the outer race to the inner race in four places.
- Remove the complete assembly from the drum and remove the sprag cage and rollers.
- Weld the back of the sprag races. We suggest grinding deep grooves so that the weld can get as deep as possible.
- Cut the center out of the sprag retainer and use it as a shim under the snap ring (figure 10).
With the sprag welded, thereʼs no need for the band; the intermediate clutch handles engine braking. The durability of this weld depends on good penetration. We only suggest this modification if youʼre having problems with the intermediate band burning.
Hydraulics
Line pressure is still fed to both accumulators and the intermediate servo, so you still have to install the complete intermediate servo assembly (figure 11), the second accumulator (figure 12), and the 2–3 accumulator (figure 13).


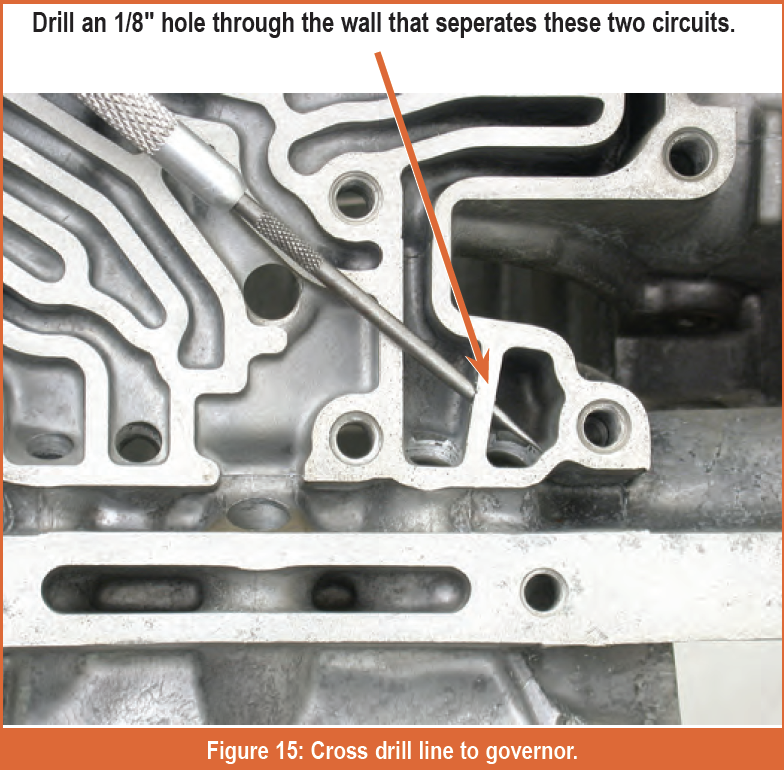
To reduce rotating weight further, you can remove the governor. To do this:
- Countersink the governor feed holes about 3/8″ deep with a 0.365″ to 0.370″ drill (figure 14).
- Plug these two holes with a 3/8″ cup plug.
- Drill a 1/8″ hole through the wall that separates the two circuits (figure 15).
This puts line pressure into the governor circuit, making it a manually-shifted transmission, which requires the following modifications.

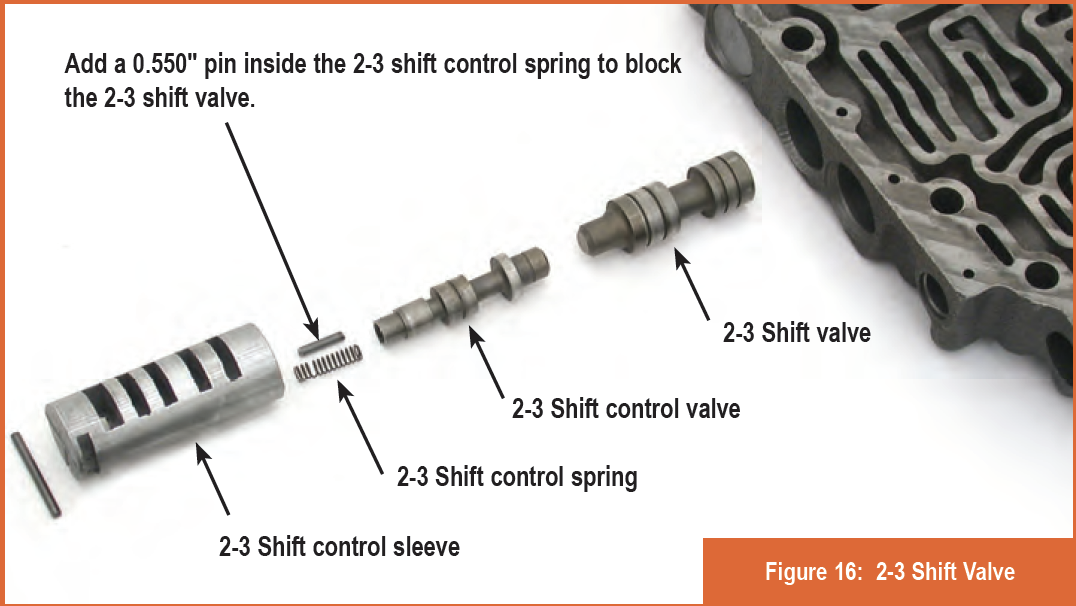
2–3 Shift Valve
Because third gear is never used, you should block the 2–3 shift valve (figure 16). To do this, install a 0.550″ Figure 12: 1-2 Accumulator Figure 13: 2-3 Accumulator Complete 1-2 accumulator must be installed in all transmissions. Complete 2-3 accumulator must be installed in all transmissions. pin inside the 2–3 shift control spring (figure 16). You no longer need the large spring that normally fits between the 2-3 shift valve and the 2–3 control valve. But donʼt throw it away… youʼll need it later.
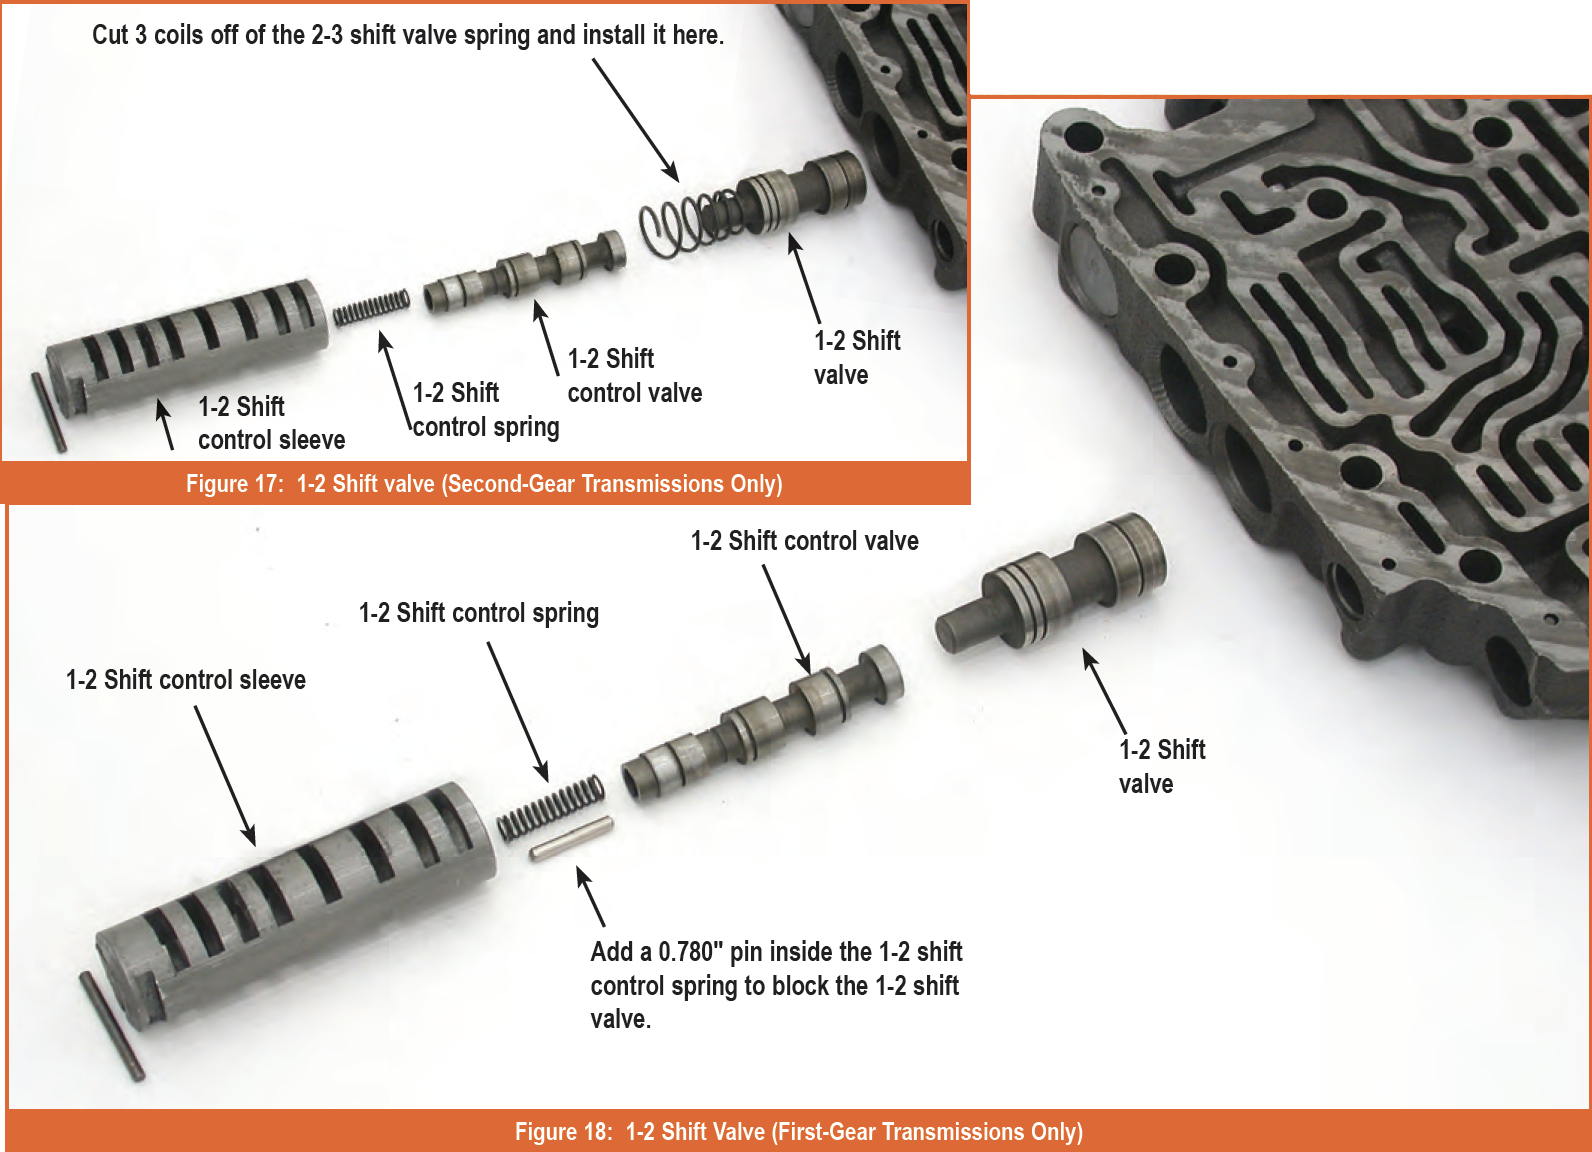
1–2 Shift Valve (Second- Gear Transmissions Only)
For second-gear transmissions, the 1–2 shift valve still has to function. But now that governor pressure equals line pressure, youʼll need to add a spring between the 1–2 shift valve and the 1–2 shift control sleeve. Cut three coils off the large end of the spring you left out of the 2–3 shift valve, and install it as shown in figure 17.
1–2 Shift Valve (First-Gear Transmissions Only)
For first-gear transmissions, you should block the 1–2 shift valve. To do this, install a 0.780″ pin inside the 1–2 shift control spring (figure 18). Thereʼs no need to reinstall the large spring in the valve lineup.

Manual Low Control Valve
For both first-gear and second-gear transmissions, youʼll need to block the manual low control valve toward the deepest part of the bore (figure 19). To do this, add a 1/4″ steel checkball inside the manual low control valve spring. It may be necessary to grind the stem of the valve to install the end plug.
Before you perform any modifications, always check the rules in your specific class to make sure you donʼt do anything that will disqualify your car.
In the next performance edition of Transmission Therapy, weʼll cover modifications to the THM200 for circle track racing. Until then, get creative and have some fun!


