I have to be honest, swapping a TH-350 from one vehicle to another was easy, nuts and bolts, compared to replacing any modern transmission. Replacing almost any vehicle component today is different than it was in the 1970’s.
Today’s transmission repairs often require programming procedures. These potential “flash” procedures can also apply to just about any component replacement. For example, General Motors had some throttle issues with some of their trucks. They issued a TSB that involved replacing some components on the throttle body and updating the PCM’s software to accommodate the new hardware.
Regardless of why we may need to program, the point is that programming is becoming more and more common and the ability to do so in-house will help complete the repairs quickly, keep your customers at your shop and keep the profits in your pocket instead of the pocket of the shop or dealer down the road. In this article, we will cover the basics of module programming that are pretty standard across most manufacturers. In the articles to come we will attack different manufacturers individually.
Programming is the act of selectively erasing data from an EEPROM and rewriting new data in its place. Also, this applies to new modules that can be shipped blank. In which case we would be “installing” the correct data onto a blank EEPROM. There have been multiple methods of performing this over the years but most manufacturers now use what is called pass-thru. Pass-thru (Figure 1) involves connecting a PC to an interface and the interface to the vehicle. The new data is then moved from the PC, usually connected to the internet, through the interface and into the vehicle’s selected module. In order for this to happen we will need a few things: a compatible PC, the correct software from the manufacturer, a validated interface and the vehicle.
 The PC must be a Windows machine. The operating system should be double checked against what the specific manufacturer approves. In most cases, Windows 7 Pro or Windows 10 will work. The PC will then have the correct Application Programming Interface (API) installed on it. The API is specific to the manufacturer. It is basically the software application that allows the PC to communicate with the specific vehicle to be connected to. It should be noted that not all vehicle manufacturer’s APIs like to exist on the same PC. For example, the Ford and Mazda applications are written by the same company, look extremely similar and share some files. As a result, the attempted sharing of files, can cause conflicts and programming failures. Additional PCs may be required when choosing to program multiple manufacturer’s vehicles.
 The interface required can be the OE’s interface/scan tool or it can be a J-2534 compatible device. We will cover some of the OE interfaces in future articles. For now, we will cover the aftermarket J-2534 options (Figure 2.) The interface, sometimes referred to as a “J-Box”, can be purchased from a variety of sources and can be manufactured by many companies. When choosing an interface, we should be sure that it is validated by the OE we intend to use it on. What validated means is that a particular OE has worked with and/or tested the device to be sure it is compatible with their programming software and vehicles (Figure 3.) Some devices that have not been validated may perform the task but if they fail during a programming event you most likely will not get any support from the OE when trying to resolve the failure. I personally use products from Drew Technologies because they have good validation coverage, were recommended to me years ago and they provide great technical support in the few instances I have needed to use it. There are other manufactures of these interfaces as well. I recommend doing your research and determining which device is the best fit for your shop. Keep in mind: you get what you pay for. No matter which device you purchase you will have to install a driver on the PC you intend to use said interface on. Actually, this will be just like installing a driver to make the new printer you just purchased work with the PC. In either case, we are just adding a piece of hardware and installing the driver to allow the PC to communicate with its shiny new friend. (Figure 3)
 The only other piece hardware that will be required is a programming charger/battery maintainer. This tool is not your average battery charger. They are designed to maintain a specific battery voltage during programming. They are required because the ignition key will have to be turned on for the duration of the programming event. Every vehicle is different but if electrical components remain on, headlamps or cooling fans for example, the battery voltage can run low and cause programming failures. The duration of a programming event varies based on the vehicle and module being programmed. If the programming event takes two minutes you will probably be alright. However, if you happen to be reprogramming a PCM on a 2007 Nissan Quest (which I performed recently) and the task takes seven hours to complete with the cooling fan running the entire time you will want to have a charger connected. Also, unlike a conventional battery charger, the programming chargers output an extremely clean DC voltage instead of a “dirty” voltage signal that includes stray AC voltage potentially resulting in programming failures as well. When deciding which charger to purchase (Figure 4) be sure to check the voltages and amperages that the manufacturers of the vehicles you plan to program require.
When all of your tooling is in order the next thing you will need is to gain access to the OE’s program files. This can be done in a few different ways. Most of the time this will involve paying a fee to the OE to subscribe over the internet. Some manufacturers allow the purchase of these subscriptions on a short term, a day or two, basis. Others may charge by vehicle. In almost all cases the subscriptions can be bought yearly if your shop can justify the cost based on how many of the particular vehicles you anticipate programming. Other manufacturers charge by the file. Occasionally, Subaru for example, the files can be purchased on CD/DVD but this will require waiting for the disc to be shipped if it has not been purchased ahead of time. These options will be covered in future articles when we cover the manufacturers individually.
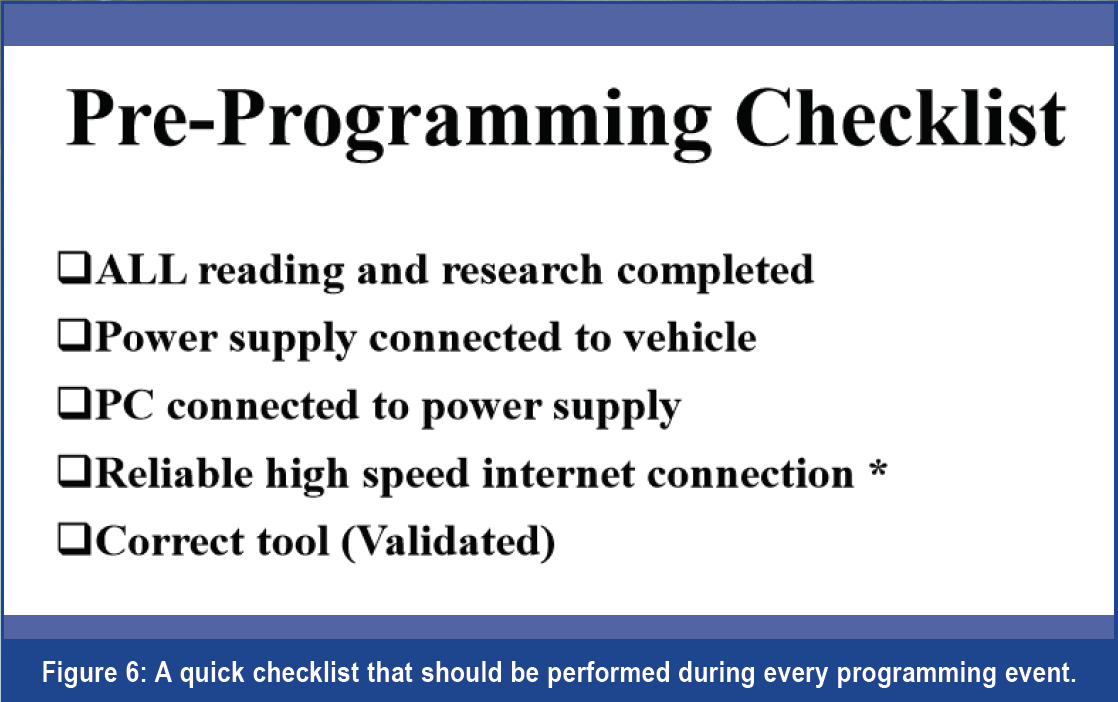
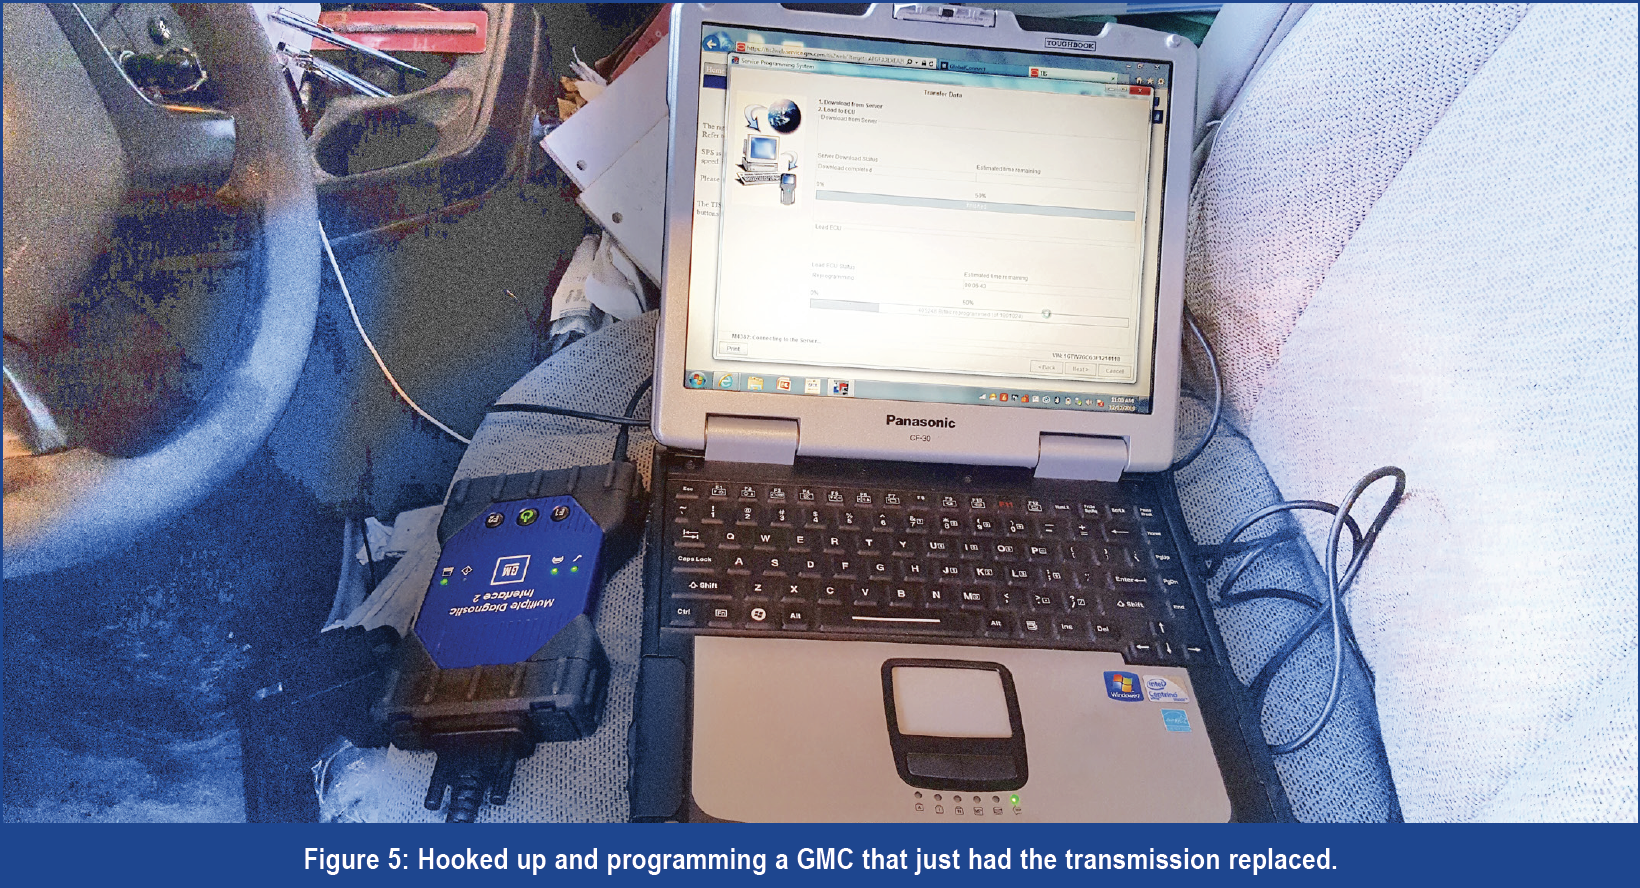 Now that we are ready to go (Figure 5) let’s spend some time on the process. Before starting the actual programming procedure, I have a preprogramming checklist (Figure 6) that I like to go through. I do this on every vehicle I program to be sure I minimize the possibility of failure. It involves reading the OE procedures and TSB’s, connecting the programming charger, connecting the PC to a power supply, ensuring my internet connection is good and making sure I have the correct interface connected. In addition to the items listed on the checklist it is a good idea to also make sure screen savers are turned off, no anti-virus software is active, pop-up blockers are off and the PC has all of the correct software installed. If you are using separate PCs for programming like I do then this should not be an issue because you will have already set up the PC appropriately.
The final step is to perform the actual programming event. Each manufacturer will have differences so they will need to be addressed individually. If we were to simplify the process to its most basic form most manufacturers would be as follows: 1. Perform the checklist in Figure 6. 2. Pay for your subscription and start the OE’s API. 3. Follow the directions from service information and the prompts in the API’s window. 4. When the API indicates “Programming Successful,” perform any after programming functions necessary. These include things like key relearns, crank shaft position sensor adaptions, etc.
 If all goes well, you should have no issues. However, there is an important point I would like to add: If a programming event fails do not turn off the ignition key. In some cases, turning off the key means everything is set in stone. Make sure the programming charger stays connected. Check for any TSB’s on programming failure recovery. Then attempt to repeat the process, unless directed otherwise by a TSB, without cycling the key to the off position even if the API instructs you to. Sometimes a failed programming event can be recovered.
That should cover the basics. Next issue we will go into more detail and be programming Ford vehicles.