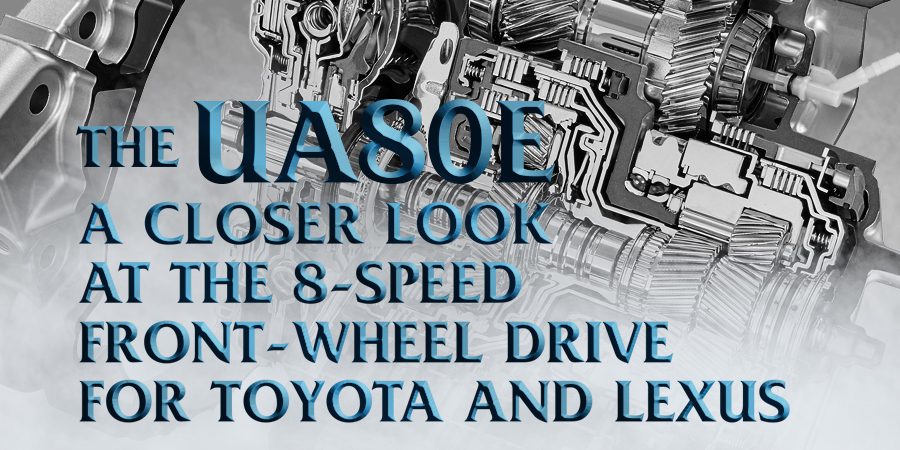
The Toyota/Lexus U880E was first introduced in the 2013 Lexus RX350 Sport. Since then, it’s become quite popular: It’s currently being used by BMW since 2015 under the designation GA8F22AW; GM started using it in 2016, calling it the 8F45; and Volvo began using it in 2014, renaming it the TG-81SC.


These transaxles have been on the road for about five years now and they’re getting a lot of miles on them. With all the different manufacturers using them, there’s no doubt you’ll soon be seeing them in your shop.
No matter how careful you are, all it takes is one distracting phone call or even a sudden sneeze: a check valve goes back in the wrong place or a shift valve gets turned around, and suddenly you’re in the middle of a nightmare.
What’s the big deal? You open your shop manual and find the correct configuration, right?
Only there aren’t any repair manuals with an exploded view for this valve body. Or even check valve locations. So that’s where ATRA’s Technical Department comes in…
The valve body that we’re going to look at is from a 2015 Lexus RX350 sport with a 3.5L engine. We’ll identify bolt locations, check valves, solenoids, valves, and springs, and discuss a few assembly tips. So let’s get started:
- The valve body has eight bolts of different lengths holding it to the case (figure 1).
- With the valve body off, remove the two bolts holding the pin retainer plate to the upper valve body, which holds the S1 and S2 solenoids in place.
- Use a magnet to remove the seven pins that hold the pressure control solenoids in place (figure 2) and remove the solenoids.
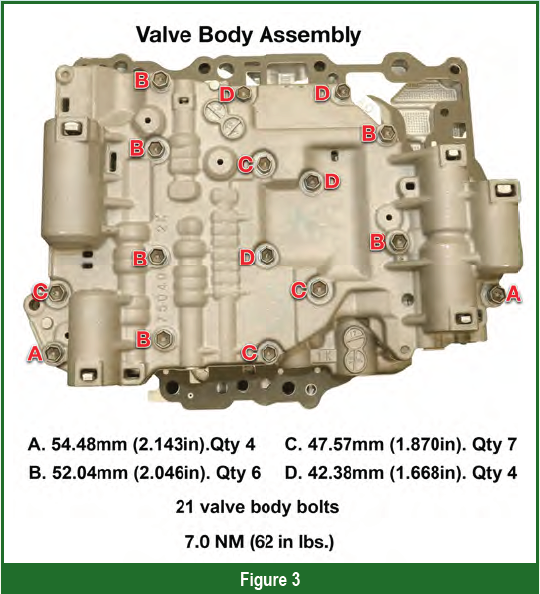
- With all the solenoids removed, turn the valve body over and remove the 21 bolts of varying lengths (figure 3).
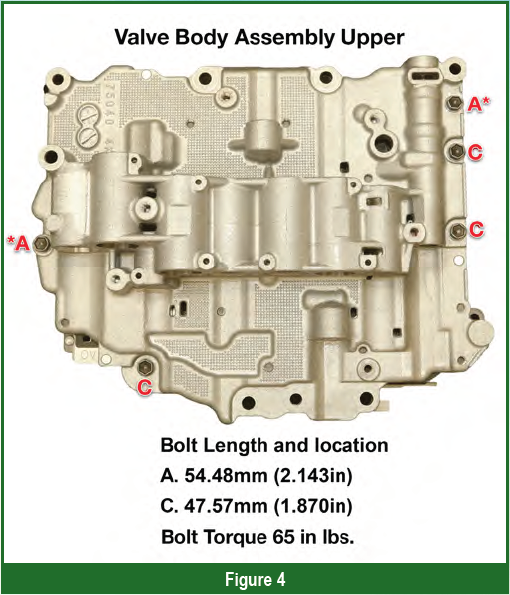
- Turn the valve body back over (figure 4); the bolts labeled A will be a big help later for putting the valve body back together.
- Hold the separator plate against the upper valve body and remove the five bolts. Then flip the upper valve body and separator plate over together; this will keep the check valve and relief valves in place.
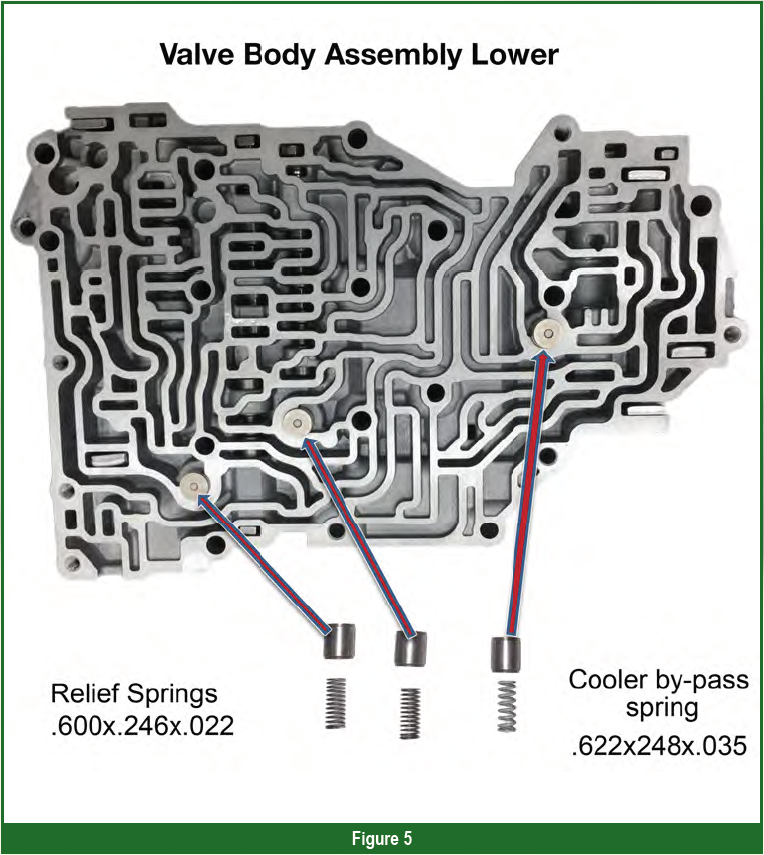
- In the lower valve body (figure 5), look for two pressure relief valves and a cooler bypass valve.
- Flip the upper valve body and remove the separator plate and upper solenoid body. In the middle valve body (figure 6) look for four check valves, five pressure relief valves and springs, and one line pressure relief valve and spring.
- Figure 7 is the valve ID and lineup with spring sizes for the middle valve body.
- Figure 8 provides the lower valve body valve ID and lineup with spring sizes.
- Clean the valve bodies thoroughly, examine them for wear or damage, and then you’re ready to reassemble them.
- Assemble the lower valve body and install the relief valves and springs (figures 5 and 8). Then set it aside with the separator plate.
- Assemble the middle valve body (figures 6 and 7) and set it aside with the separator plate.
- Install the bolts in the upper valve body (figures 2 and 4). Place it onto the middle valve body and set it aside.
- Place the lower valve body and separator plate in front of you. Place the middle and upper valve body assembly onto the lower valve body, and hand tighten the two bolts; that’ll keep the valve bodies together and make it easy to finish assembling them.
- Tighten all valve body bolts to 65 lb-in.


Transaxle Fluid Fill
One of the biggest problems with this unit occurs when you use the wrong type of transmission fluid. Improper fluids can cause all sorts of shift problems and may affect transmission life.
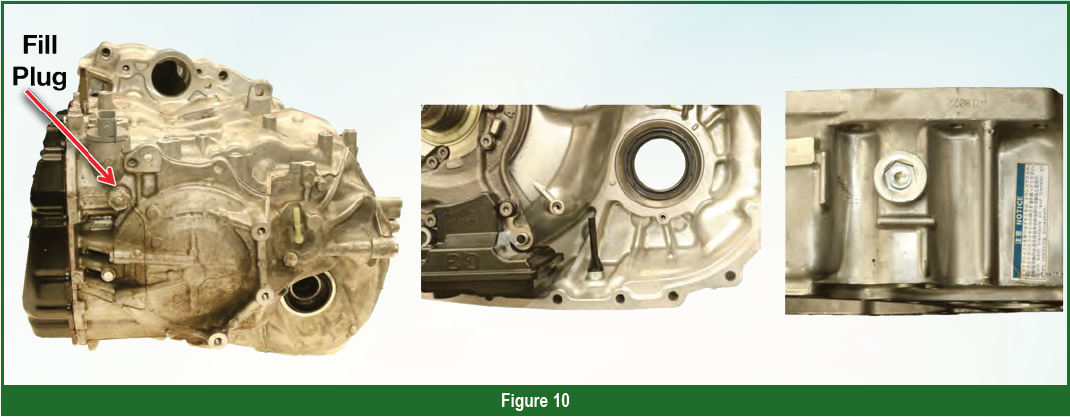
This transaxle requires Genuine ATF WS transmission fluid (figure 9). Transaxle fill procedure (figure 10):
- Remove the refill and overflow plugs.
- Fill the transaxle through the refill hole until fluid begins to trickle out the overflow tube.
- Temporarily install the overflow plug.
- Allow the engine to idle with the air conditioning off.
- Move the shift lever through entire gear range to circulate the fluid.
- (F1) If you have a Techstream:
- Connect your Techstream to the DLC3.
- Turn the Techstream on.
- Enter Powertrain / ECT / Data List.
- Check A/T Oil Temperature 1.
- Allow the engine to idle until the fluid temperature reaches 39ºC (102ºF).
- (F2) Without Techstream (using D shift indicator; figure 11):
- Connect DLC3 terminals CG (4) and TC (13) using SST 0984318040 (or equivalent).
- Move the shift lever back and forth between N and D at 1.5 seconds intervals for six seconds (four times).
- The D shift indicator on the combination meter should come on for two seconds when the fluid temperature is within the appropriate range.
- Add fluid until it comes out the overflow plug; wait until the overflow slows to a trickle.
- Install the overflow and refill plugs, using new gaskets.
Relearn Procedure
You must reset the ECM after installation, before driving the vehicle. To do so, you’ll need an OE or approved scan tool to reset the adapts (reset ECM/ PCM).
Failure to do so can result in slipping or binding shifts and failure of the transmission after only a short road test.
Some remanufacturers will require that you follow these steps or they’ll void your warranty:
- Verify that computer has latest software calibrations.
- Clear codes.
- Reset Adaptive Learn.
- Rescan after the road test and make sure no codes have come back.
You’ll need the proper equipment to reset the adaptive learn. If you don’t have the equipment available, you’ll need to tow the vehicle to a Toyota/ Lexus dealership or other facility with OEM-type equipment.
So there you have it: a complete breakdown of the valve body for a U880E transmission, along with the procedures necessary to reset the computer system and get the unit running right.
And that’s not just smart: That’s street smart!